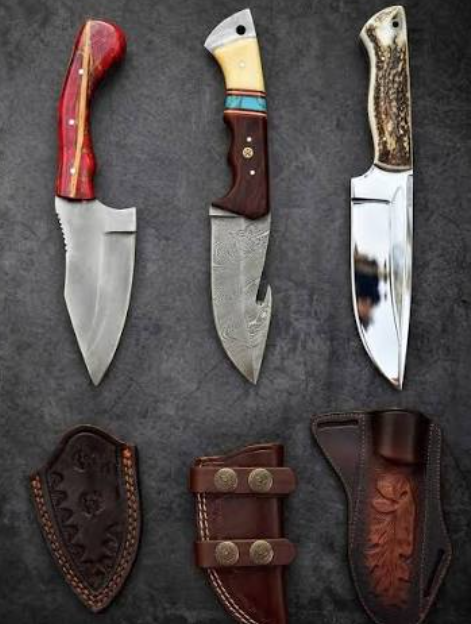
Working with knife blanks can be a rewarding way to explore knife making, customize a blade, and develop practical craftsmanship skills. However, even a simple project can become frustrating when you overlook preparation, choose unsuitable materials, or rush important finishing steps. Avoiding common mistakes helps you achieve a more professional result while reducing wasted materials, time, and effort.
Whether you are a beginner making your first custom knife or an experienced craftsperson refining your technique, understanding the basics makes a difference. Exploring the knife blank blades collection can help you discover starting points for different knife-making projects and personal designs.
1. Choosing the Wrong Knife Blank for Your Project
One of the most common mistakes is selecting a knife blank based on appearance alone. A blade may look attractive, but its size, profile, steel type, and intended use should also match your project.
For example, a blank intended for a compact utility knife may not suit a larger outdoor knife. Similarly, a blade profile designed for a particular cutting task might not provide the geometry you need for another application.
Before making a purchase, consider:
- Blade size: Check the blade’s length, width, and overall proportions.
- Steel type: Understand the material and its care requirements.
- Blade profile: Choose a shape suited to the intended purpose.
- Construction: Confirm whether the tang and mounting features fit your handle design.
- Skill level: Start with a straightforward blank if you are learning.
If you are exploring different styles or planning another project, JW SteelCrafts is a place to browse knife-related products and find inspiration for your next build.
2. Ignoring the Blank’s Material and Condition
Not all knife blanks are made from the same steel, and different materials can require different finishing methods and maintenance routines. Assuming every blank behaves identically may lead to poor results.
Before beginning, review the product information to determine the steel type, whether the blade is hardened, and which finishing processes are appropriate. Inspect the blank for visible defects, damage, corrosion, or irregularities that could affect your work.
If the steel type or heat-treatment condition is unknown, avoid guessing. Ask the supplier for specifications or consult a qualified knifemaker before proceeding with operations that could affect the blade’s properties.
Understanding the material first allows you to choose suitable tools and avoid unnecessary rework.
3. Skipping the Design and Measurement Stage
Starting immediately without a clear plan often creates problems with handle proportions, alignment, and overall appearance. Small measurement errors can become difficult to correct after the handle has been attached.
Create a basic drawing before working on the knife blank. Mark the intended handle dimensions, pin locations, and any decorative features. Check that the design provides a comfortable grip and leaves enough room for secure attachment.
It is also helpful to make a simple cardboard template of the handle. You can compare its proportions with the blank before cutting valuable handle materials.
A little planning at the beginning can prevent hours of correction later.
4. Using the Wrong Tools for the Job
Using unsuitable or poorly maintained tools can damage materials and make a project harder than necessary. Dull files, inappropriate drill bits, unstable clamps, and worn abrasives may produce rough surfaces or inaccurate fittings.
Choose tools based on the specific task rather than assuming one tool can handle every stage. Measuring equipment helps maintain accuracy, while suitable files and abrasives allow controlled material removal. Secure clamping also reduces movement during fitting and finishing.
Before starting, check that your tools are in good condition and appropriate for the material. Read equipment instructions and use suitable eye, hearing, and respiratory protection when the work produces sparks, noise, or fine dust.
5. Applying Too Much Pressure During Grinding
Aggressive grinding is a common cause of uneven surfaces and unwanted material removal. Pressing too hard can create deep scratches, uneven bevels, and excessive heat.
Excessive heat is particularly concerning when working with a hardened blade because it can affect the steel’s temper and reduce edge performance. Discoloration may indicate overheating, although the absence of visible color does not guarantee that the blade has stayed cool.
To reduce these risks:
- Use controlled, light passes rather than forcing the blade against the abrasive.
- Keep the work moving to avoid concentrating heat in one area.
- Inspect the surface frequently under good lighting.
- Follow the steel manufacturer’s recommendations for grinding and cooling.
- Stop if you notice unexpected discoloration or other signs of overheating.
If you are unsure how to preserve the blade’s heat treatment, seek guidance from an experienced professional before continuing.
6. Neglecting Handle Fit and Alignment
A beautiful blade can still look unfinished if the handle fits poorly. Gaps between the handle scales and tang, misaligned pin holes, uneven edges, and uncomfortable contours can all reduce the quality of the finished knife.
Always test the fit before applying adhesive or permanently fastening the handle. Check that the scales sit evenly against the tang and that planned holes align correctly. Dry-fitting the components gives you an opportunity to make adjustments without damaging the finished surfaces.
Consider the handle’s shape as well. A handle that looks attractive in a photograph may feel uncomfortable during actual use. Smooth transitions and balanced proportions usually produce a more refined result than unnecessary decorative features.
7. Rushing the Adhesive and Assembly Process
Assembly mistakes often happen when makers rush through surface preparation or fail to allow sufficient curing time. Dust, oil, fingerprints, and poorly fitted components can interfere with a secure adhesive bond.
Follow the adhesive manufacturer’s instructions for surface preparation, application, clamping, and curing. Clean the relevant surfaces with a product compatible with the materials, and avoid touching them unnecessarily before assembly.
Do not assume that an adhesive is fully cured simply because it feels dry. Respect the recommended curing period before shaping, finishing, or putting stress on the assembled handle.
A careful assembly process helps prevent loose scales, visible gaps, and avoidable repairs.
8. Skipping the Sanding Stages
Another common mistake is jumping directly from coarse abrasives to fine sandpaper. Fine abrasives cannot efficiently remove every deep scratch left by an earlier stage, so those marks may remain visible beneath the final finish.
Work through suitable abrasive grades in a logical sequence. After each stage, inspect the surface and confirm that the previous scratches have been removed before moving to a finer grade.
Use consistent lighting to reveal imperfections, and pay attention to transitions around the handle, pins, and blade surfaces. Depending on the material, hand sanding may offer greater control over small details than powered equipment.
Patience during finishing often makes the difference between an acceptable project and a polished, professional-looking result.
9. Forgetting About Safety During Knife-Making
Knife blanks require careful handling because unfinished edges may be sharp, and grinding or drilling introduces additional hazards. Treating safety as an afterthought can result in preventable injuries.
Keep the workpiece securely clamped whenever appropriate, maintain a clean work area, and avoid placing your hands in the path of cutting or grinding equipment. Wear suitable eye protection and use hearing and respiratory protection appropriate to the task and the materials involved.
When using powered equipment, follow the manufacturer’s operating instructions and ensure that guards and other safety features are in place. Grinding dust and sparks should be managed with appropriate ventilation and fire precautions.
Heat treatment and hot-work processes require additional expertise, suitable equipment, and careful fire-safety planning. Do not attempt unfamiliar processes without understanding their risks.
10. Applying an Unsuitable Finish
The finish should suit both the blade material and the intended style of the knife. Using the wrong polishing compound, coating, or cleaning product can leave stains, uneven results, or unwanted residue.
Before applying any finish, confirm that it is compatible with the steel and handle materials. Test products on a small, inconspicuous area when possible, and follow the manufacturer’s instructions.
For wooden handles, choose a suitable protective finish and allow it to cure fully. For metal surfaces, use products designed for the relevant steel and storage conditions. Keep adhesives, coatings, and polishing compounds away from areas where they could compromise the intended function of the finished knife.
A suitable finish improves appearance while supporting appropriate care and maintenance.
11. Failing to Inspect the Finished Knife
Completing the assembly does not mean the project is ready for use. A final inspection helps identify problems that may have gone unnoticed during earlier stages.
Check the handle for movement, visible gaps, rough edges, and incomplete finishing. Inspect the blade for unexpected damage, corrosion, or signs of heat-related problems. Confirm that all components are secure and that the knife is appropriate for its intended purpose.
If the blade has undergone heat treatment, verify that the process followed the specifications for its particular steel. Do not assume that appearance alone confirms correct hardness or performance.
Resolve any structural or material concerns before using or presenting the finished knife.
12. Choosing Complexity Over Practicality
Decorative details can make a custom knife distinctive, but too many complicated features can make a project difficult to complete well. Intricate handle shapes, elaborate inlays, and ambitious finishing techniques may introduce challenges that are unnecessary for a first project.
Start with a design that matches your current abilities. Focus on accurate measurements, a secure handle, clean finishing, and careful inspection. As your skills improve, experiment with more advanced designs and decorative elements.
If you are exploring different styles or planning another project, JW SteelCrafts is a place to browse knife-related products and find inspiration for your next build.
How to Get Better Results When Working with Knife Blanks
Avoiding mistakes becomes easier when you follow a consistent process. Begin by selecting a suitable blank, confirming its material specifications, and preparing a clear design. Gather the appropriate tools, check the fit of the handle components, and approach each finishing stage with patience.
See Also: Creating Professional Shopify Product Images with AI: A Practical Guide for Online Stores
Keep notes about the materials and methods you use. Recording what worked well and what needed improvement can help you refine future projects and avoid repeating the same errors.
Most importantly, recognize when a process requires specialized knowledge. Heat treatment, significant blade modification, and other demanding operations may be best handled by a qualified knifemaker when you lack the necessary equipment or experience.
Frequently Asked Questions
What is a knife blank?
A knife blank is an unfinished or partially finished blade component used as the starting point for a knife-making or customization project. Its exact condition varies by product. Some blanks may require substantial work, while others may already have a defined profile or other finishing completed.
What should I check before buying a knife blank?
Review the blade dimensions, steel type, tang design, condition, and intended use. Check whether the blank is hardened or requires further processing, and confirm that its specifications match your project and skill level.
Can beginners work with knife blanks?
Yes. A straightforward project can help beginners learn about measurement, handle fitting, surface preparation, and finishing. Choose a blank that matches your abilities, use appropriate protective equipment, and seek expert help for unfamiliar or high-risk processes.
Why is my knife handle not fitting properly?
Common causes include inaccurate measurements, misaligned holes, uneven contact surfaces, and handle scales that were not dry-fitted before assembly. Check the alignment and fit before applying adhesive or permanently fastening the components.
How can I prevent scratches from showing through the final finish?
Use an appropriate progression of abrasive grades and remove the previous stage’s scratches before moving to finer abrasives. Inspect the surface under good lighting throughout the process instead of waiting until the final polish.
Is heat treatment necessary for every knife blank?
Not necessarily. Some blanks may already be heat-treated, while others may require further processing. Check the supplier’s specifications before proceeding. Heat treatment must follow the requirements for the specific steel, so avoid relying on a universal temperature or method.
How do I maintain a finished knife?
Keep the knife clean and dry, follow care guidance appropriate to its steel and handle materials, and store it in a suitable environment. Inspect the handle and other components periodically, and address signs of corrosion or looseness promptly.
Final Thoughts
Working with knife blanks offers an opportunity to develop practical skills and create a knife that reflects your own design choices. However, success depends on more than the appearance of the finished blade. Careful material selection, accurate measurements, proper handle fitting, controlled finishing, and consistent safety practices all contribute to a better result.
By avoiding these common mistakes and taking time to inspect your work at every stage, you can reduce wasted materials and build confidence with each project. Start with a manageable design, follow the specifications for your materials, and treat every stage as an important part of the craft.